Basics with Markups
Markups are the main tools used for editing and marking up a document. In this tutorial you will learn how to create, edit and manipulate markups.
About 80% of time spent with Bluebeam will be spent in the Markups Tab in the Ribbon. For convenience the RXDS Profiles have been set up with all markups in the right toolbar. If a tool cannot be found in the Right Side Tool Bar, look for it in one of the dropdowns under the Markups Tab in the Ribbon.
The examples below will be making use of both the Markup Ribbon and Right Side Tool Bar as well as simple keyboard shortcuts that maybe found by hovering over any markup tool item. All markups function in pretty much the same manner. Here are some examples and tips and tricks on a few of the different available markups
If you would like to follow along or would just like to practice Download it Here.
Line
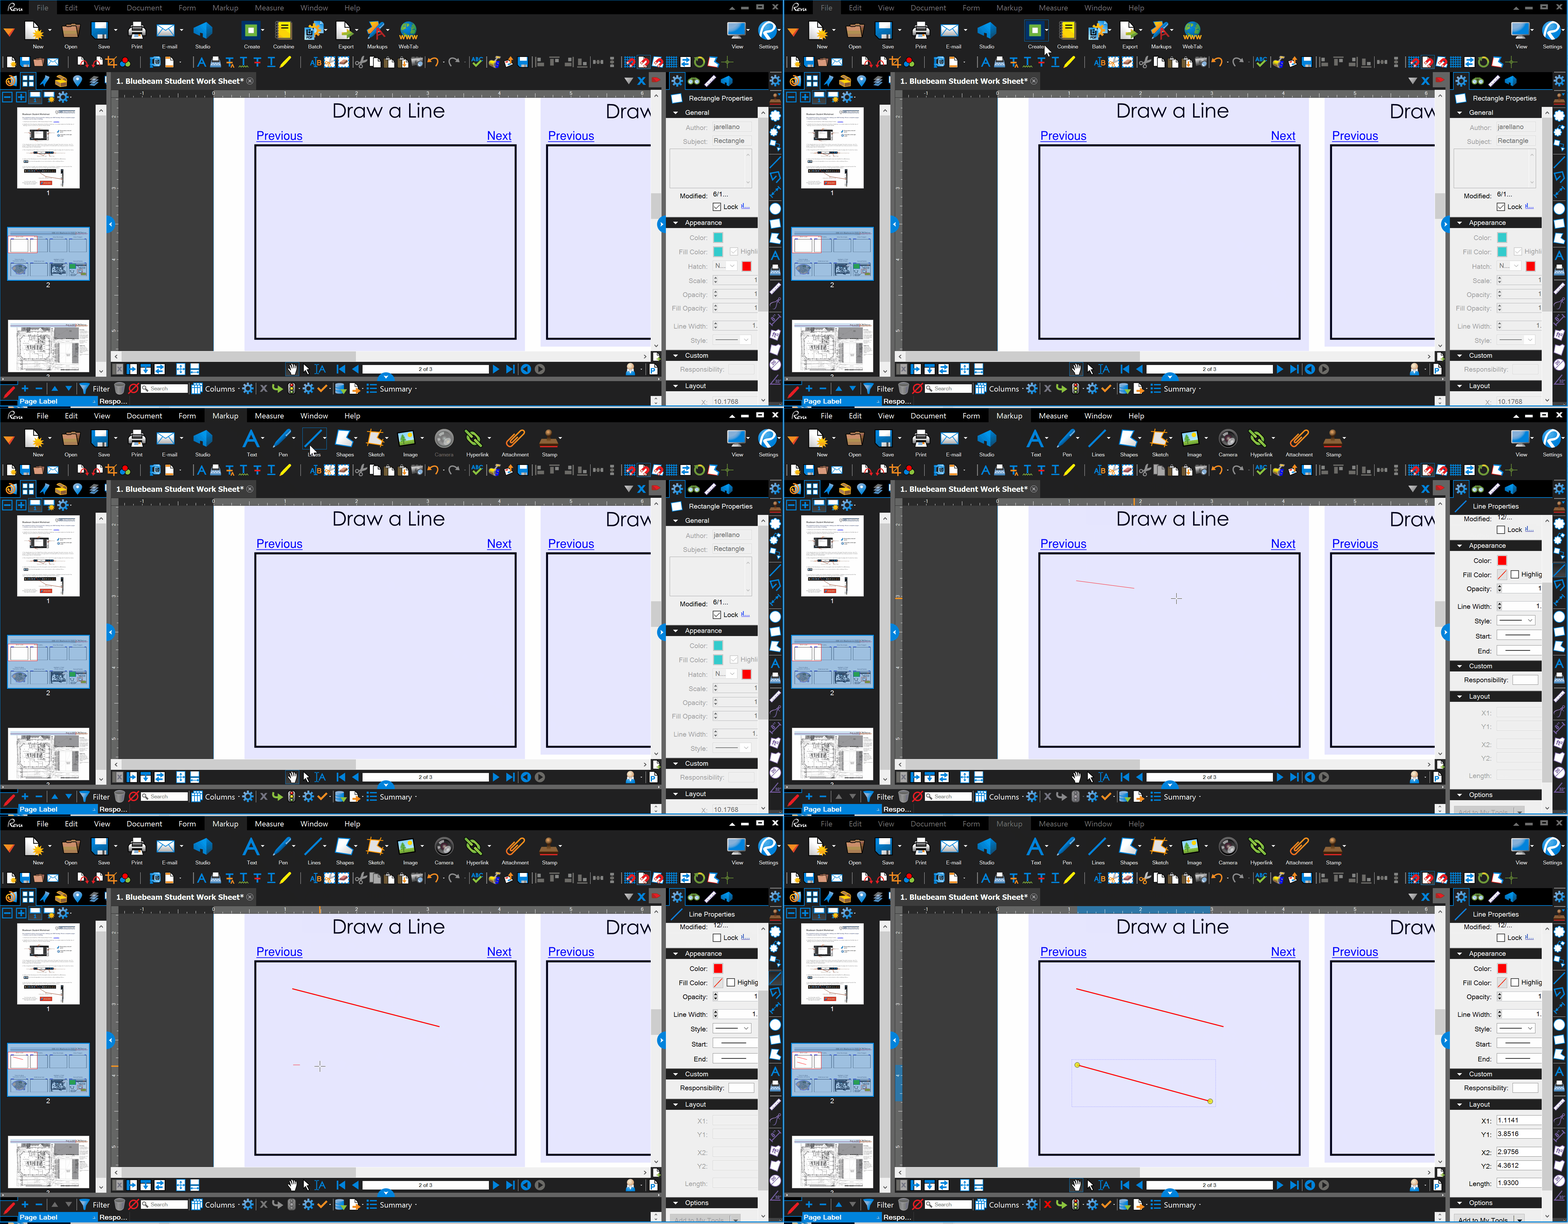
The line tool allows you to draw a line from one point to another. In the properties panel you may change properties such as color, thickness and style. Please note that the fill color is only applicable if a start or finish filled arrow is applied.
Polyline
The Polyline, like the line tool, is one dimensional therefor has no fill color even when closed. The Polyline tool will allow you to draw multiple connected lines. To close a Polyline Do Not Press ESC as this will erase your entire line. Instead do one of the following:
- Click on the first point created to close the shape. Note: this will still not allow you to fill the shape. Use a polygon for that functionality
- Press enter at any time while creating the polyline
- Double Click on your last point

Rectangle
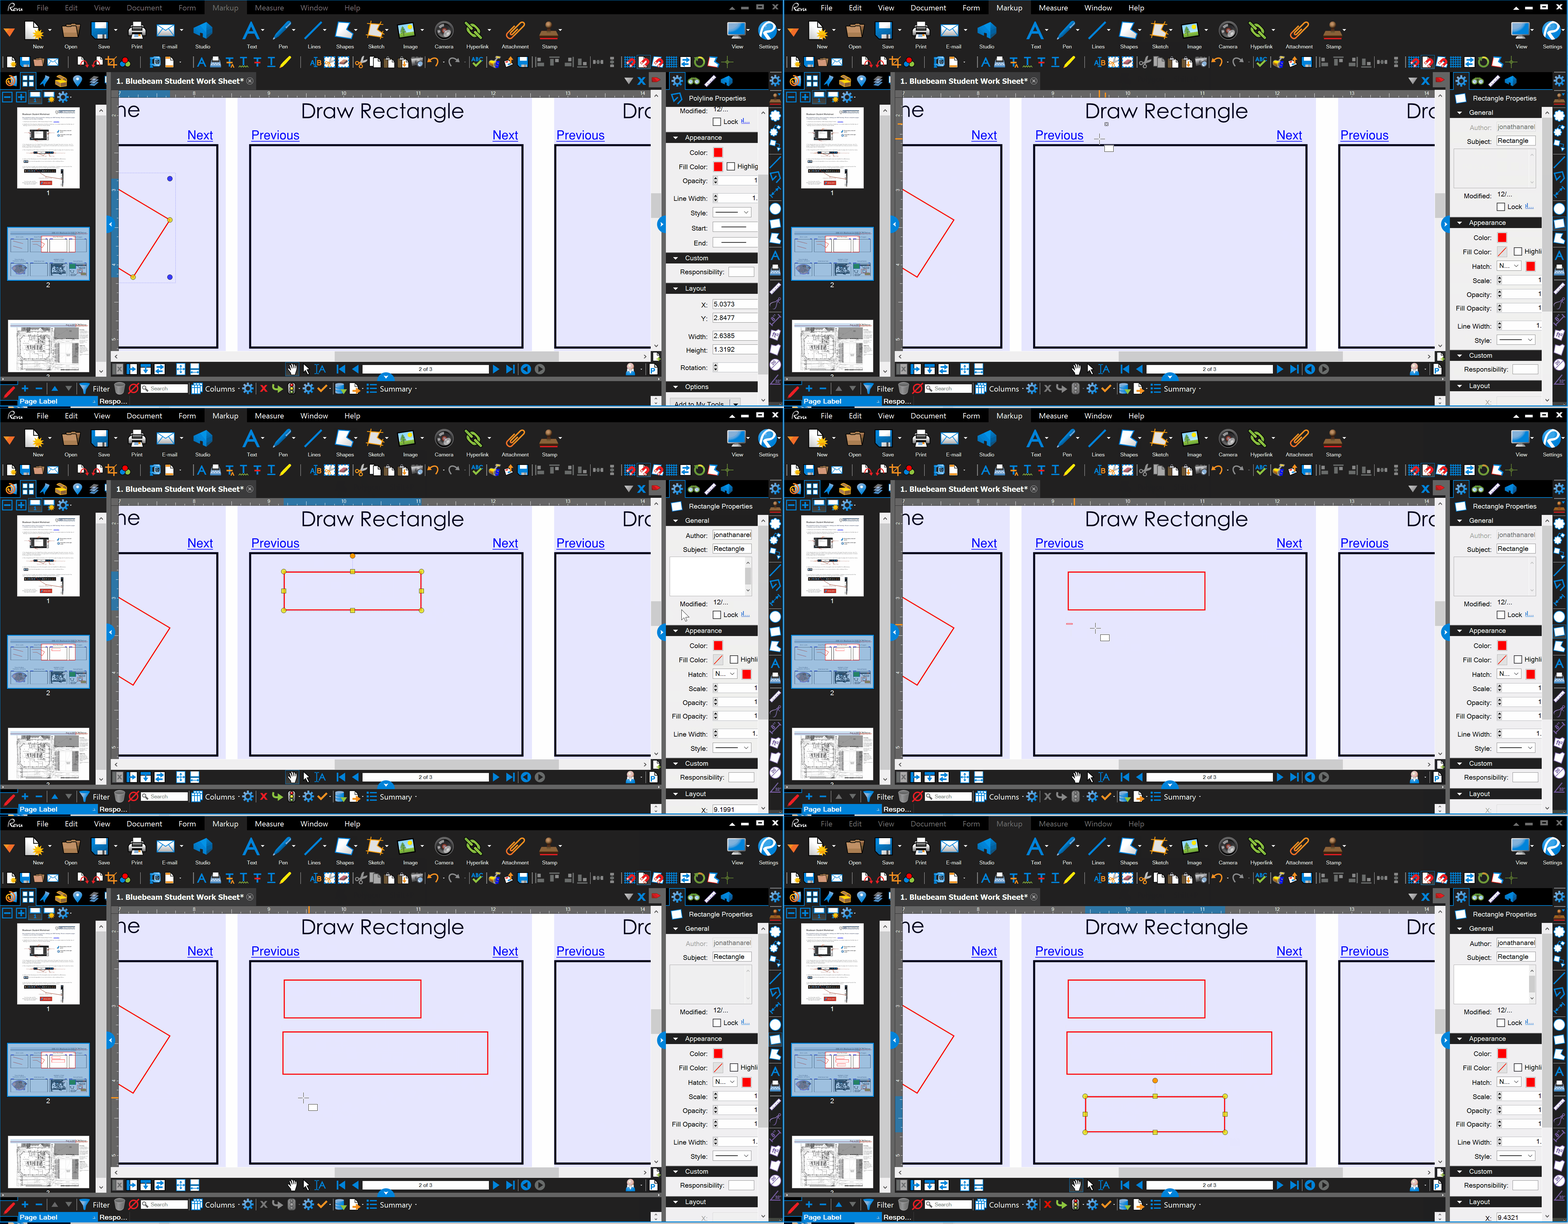
The Rectangle tool allows you to create fillable and hatchable rectangles by clicking on two points as shown below.
Polygon
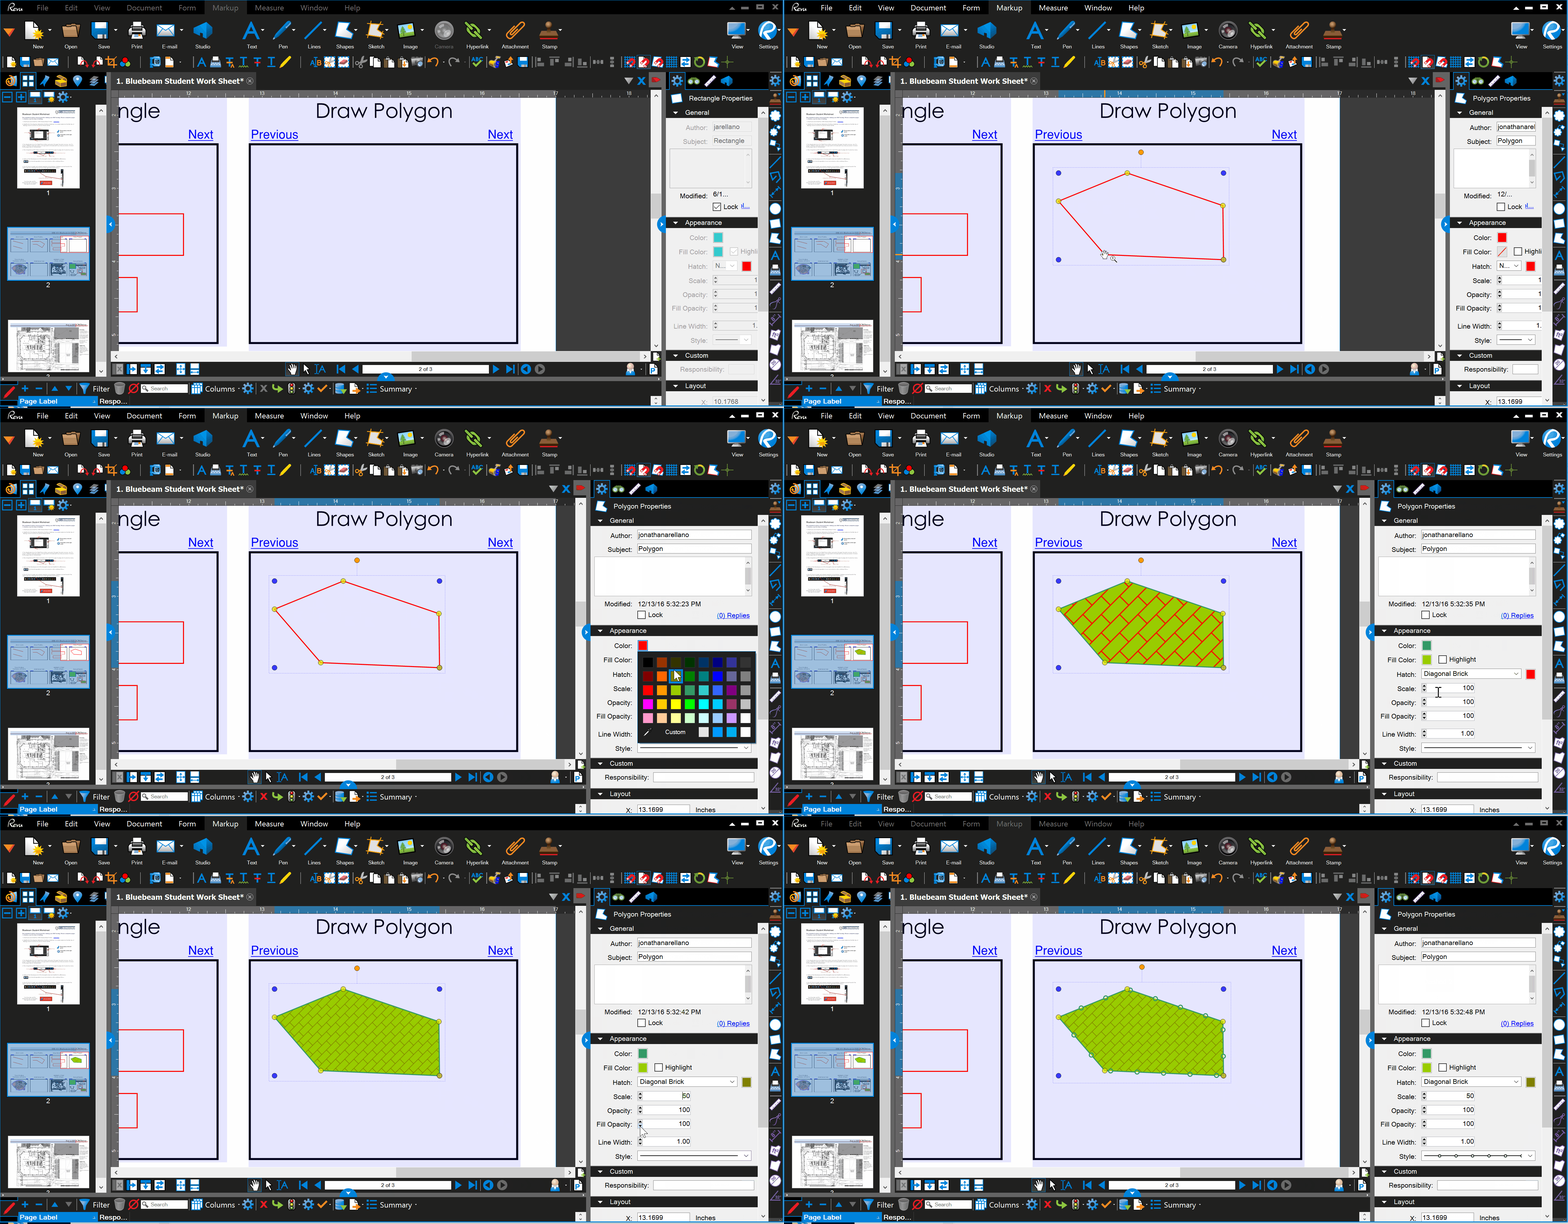
The Polygon tool is a mix between the polyline tool and the rectangle tool as it allows you to create multisided shapes which are also fillable and hatchable.
For all markups feel free to test out all properties in the properties panel on the right side.
Text
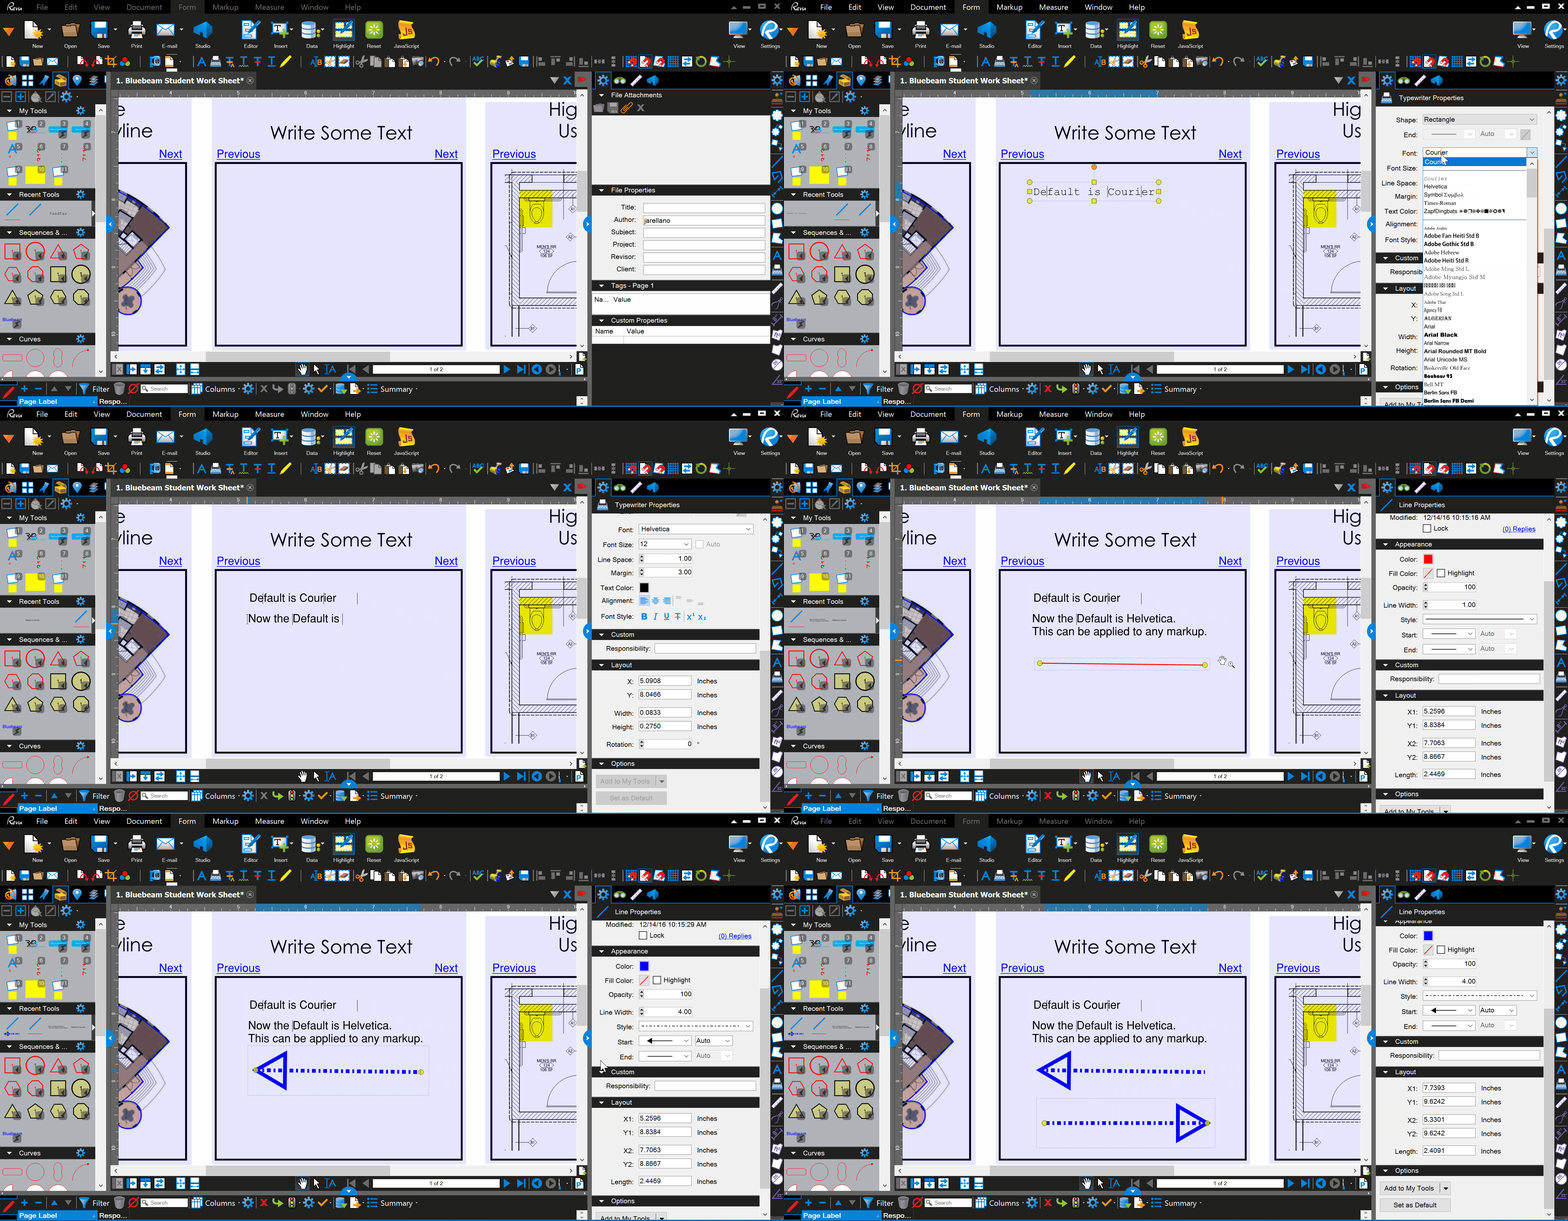
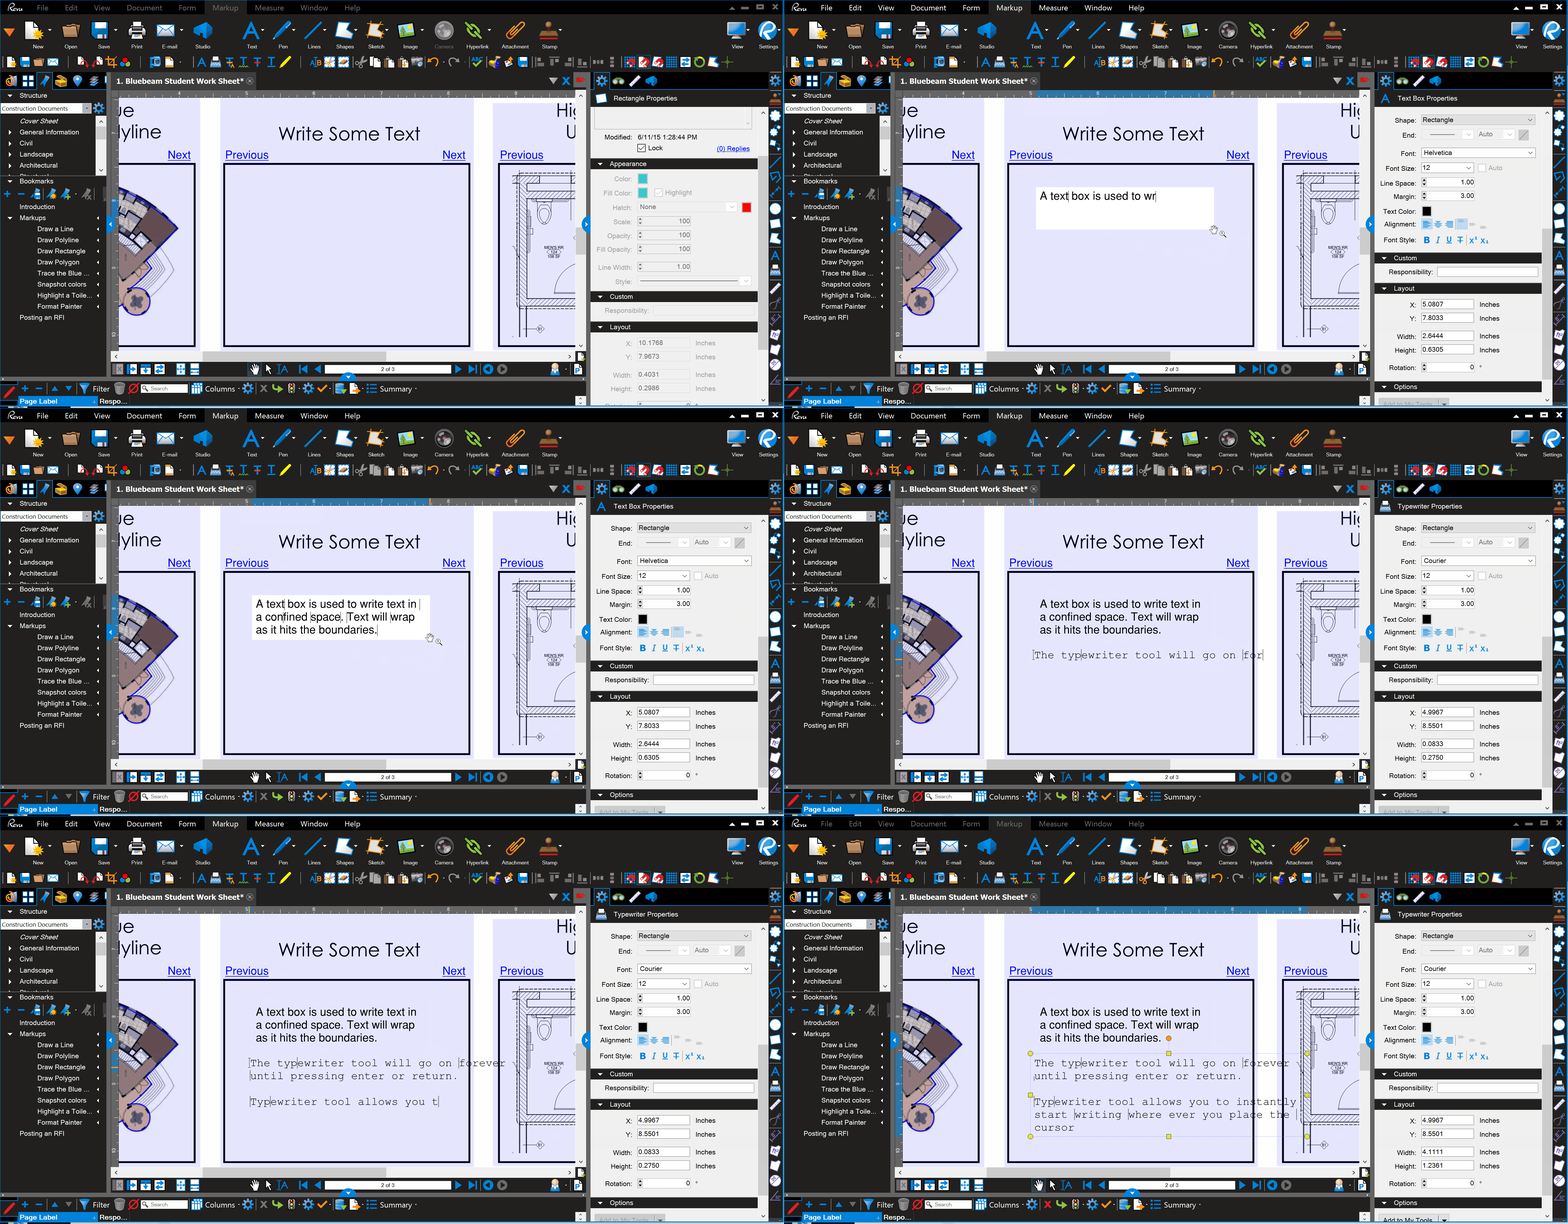
Text may be writen in one of two ways:
- Using the Text Box tool which will allow you to write text with in the confinements of the drawn box. The box may be resized after it has been closed using the
ESCbutton on the keyboard. - Using the Typewriter tool which allows you to start writing where ever the cursor is placed. With this tool text will stay on the same line until the
Returnkey is pressed. The default text for the Typewriter tool is Courier but can be changed. Please see the “Changing Defaults” section toward the bottom of this tutorial.
Highlighting (MyTools Example Included)
Highlighting text using the highlight tool works great but many times we do not need to highlight text but rather shapes.
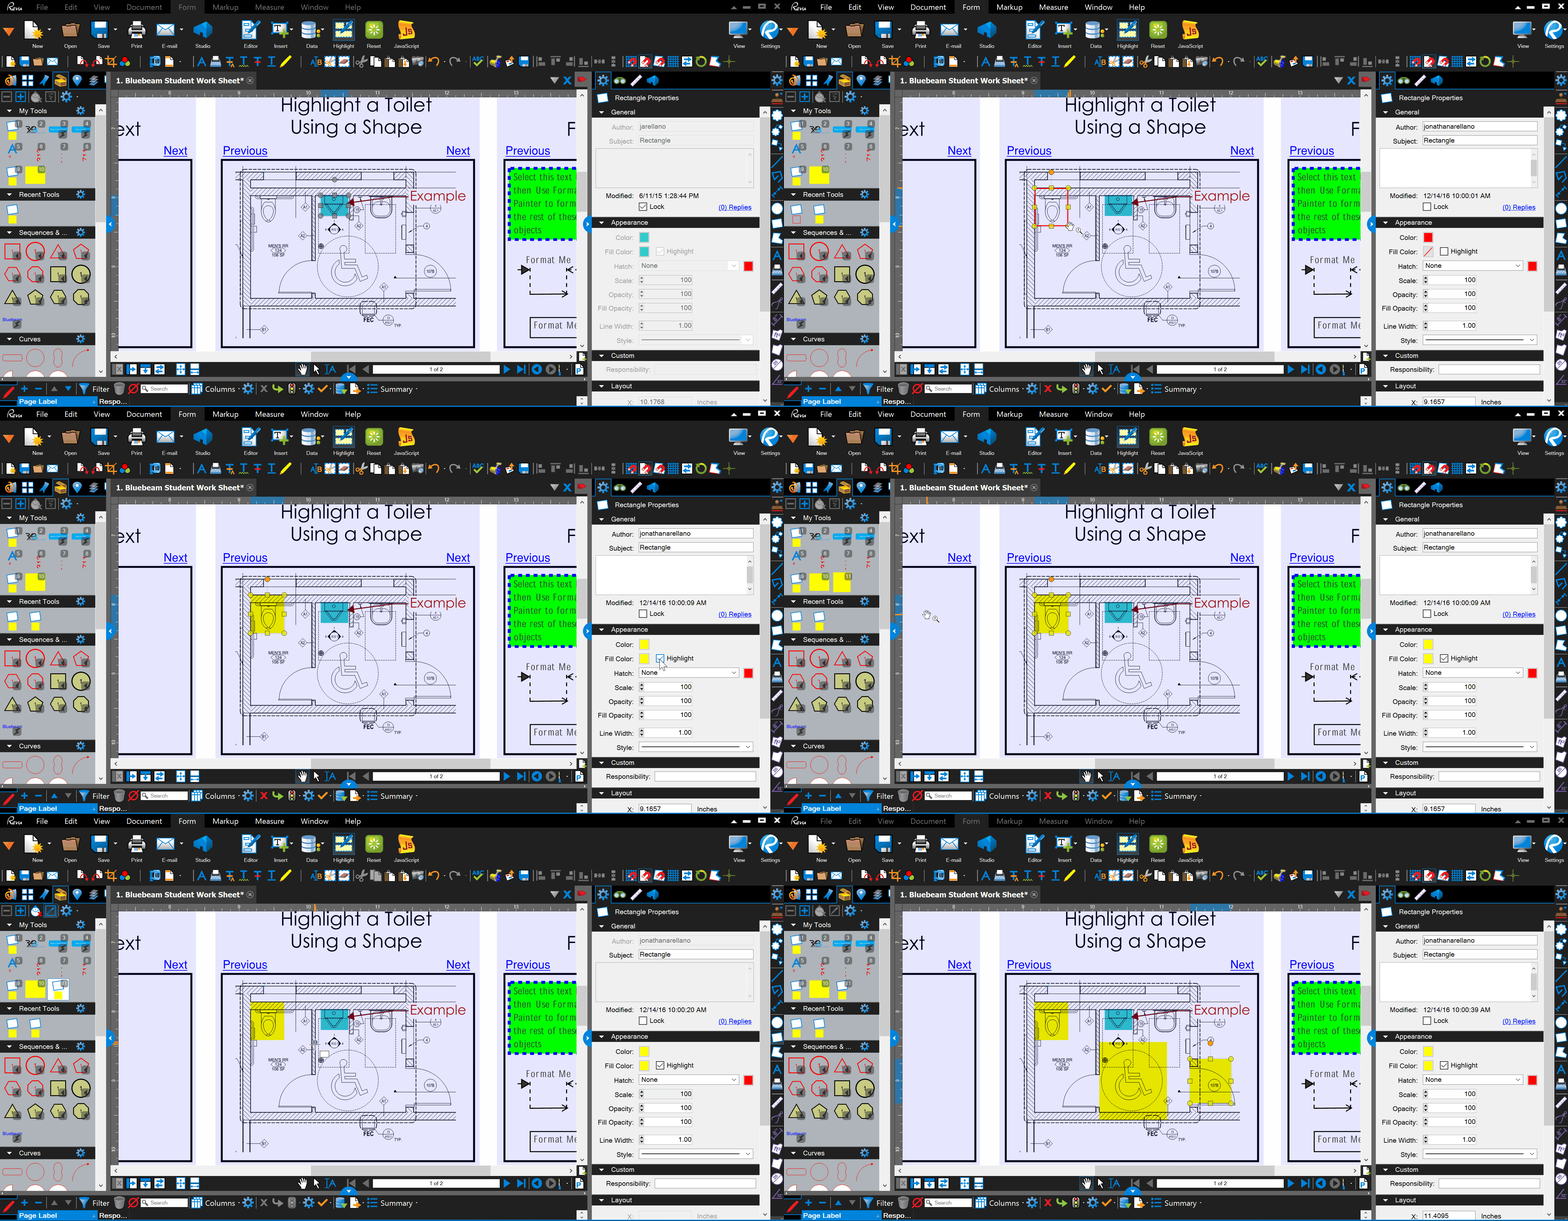
Highlighting objects may be accomplished using the Rectangle tool.
- Select the Rectangle Tool and draw a rectangle on a shape that you wish to highlight
- Add a fill color and change the color to the same color.
- Click on the highlight checkbox next to the fill color.
Save to MyTools
This tool that we just created can be very useful to highlight other items. In order to save this as it’s own tool we can add it to MyTools in the Toolchest located in the left panel. After this you will be able to add as many of your own tools as you’d like. Feel free to delete the default bluebeam tools as they are not very useful.
- Right click on the highlighted rectangle and select Toolchest –> MyTools
- The Highlighted Rectangle will show up in the Toolchest Panel on the right side.
- At this point the Rectangle can be used to draw the exact size rectangle
- Double click on the item to convert it to a tool
- Click on the item and use it to highlight something else.
- Note: The number on the corner of the tool can be used as a shortcut key.
Format Painter
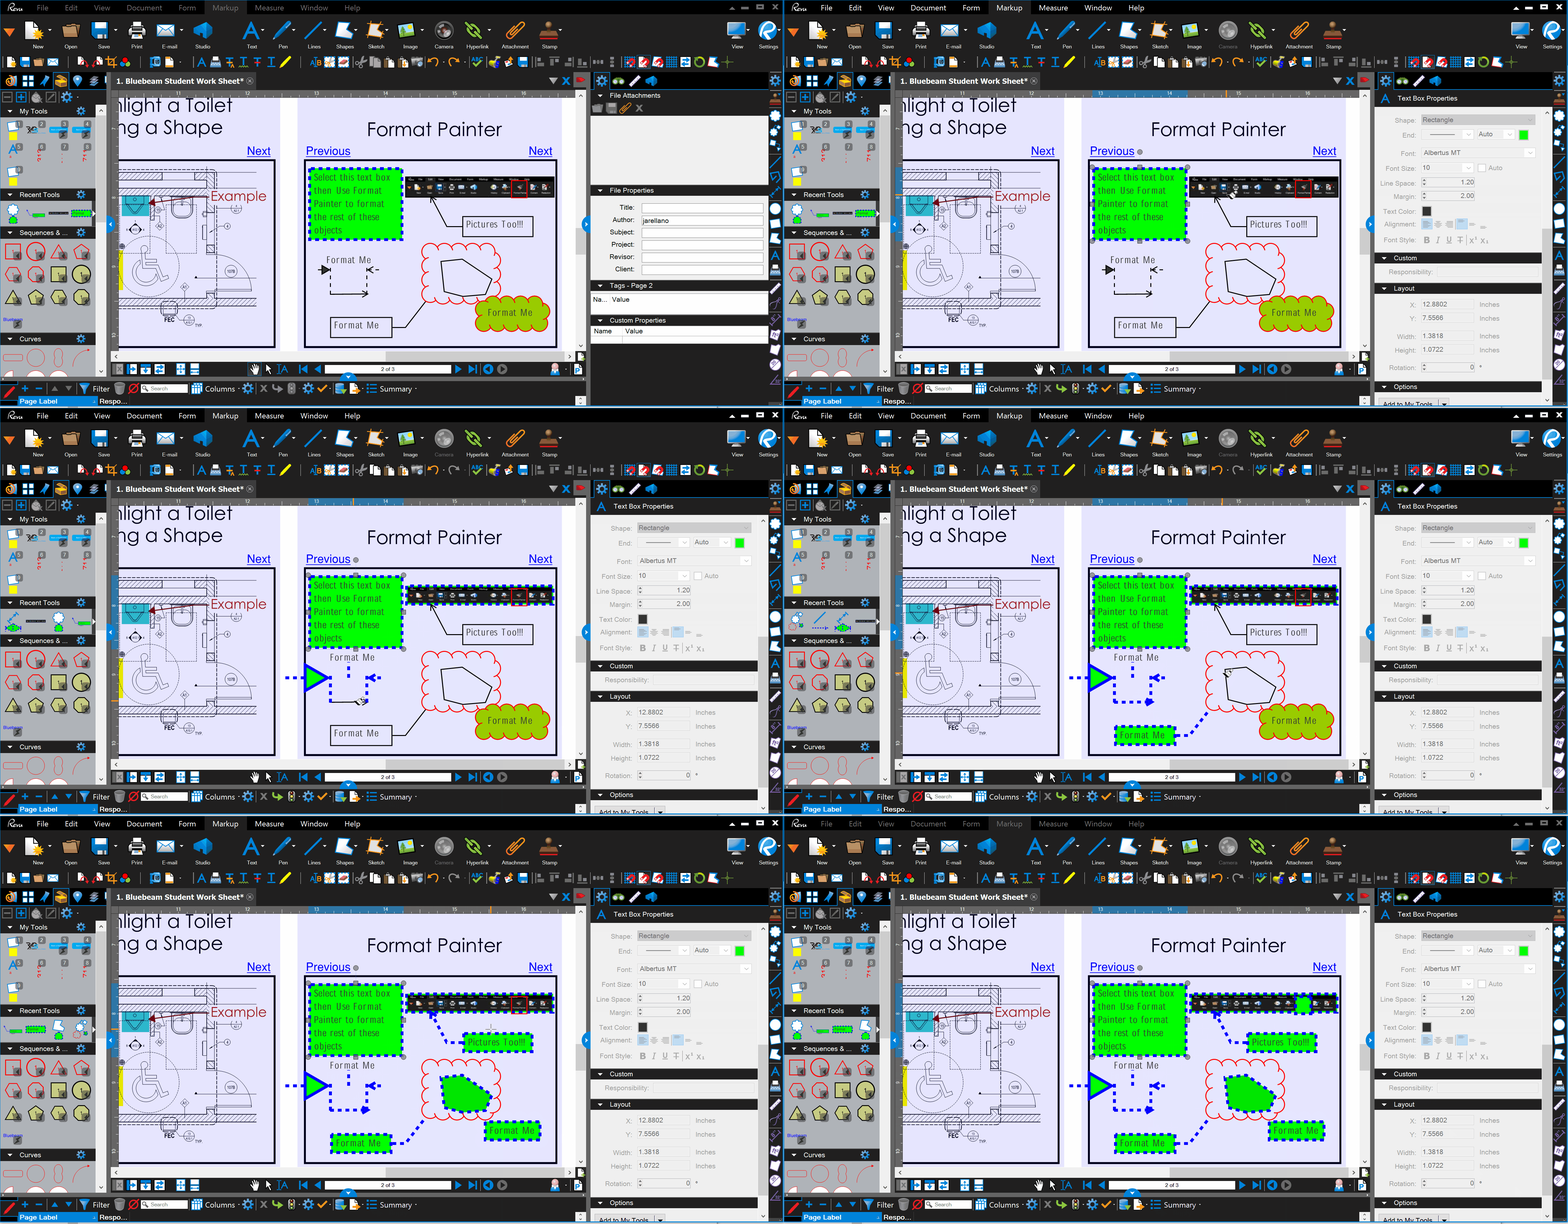
The Format Painter, like in other programs such as Excel, allows you to copy properties of one shape onto another. This is useful when trying to format many items to have a consistant look and feel.
- Right click on the markup which you would like to copy it’s properties.
- Click on Format Painter
- Hover over other markups until you see a Painbrush appear then click Note: The cloud on the Cloud+ tool will not change because the the callout is taking in the properties already.
Save Defaults
Many times we find ourselves having to change markup properties in the exact same way all the time. If there are certain properties that you prefer on any markup, you can set those as defaults as shown below.
- Set the properties that you like
- Scroll down in the Properties Panel and click on
Set Defaults
