Drawing Processing Part 1
This is part 1 of Drawing Processing. The initial processing of drawings is the most important part as it will set up the initial labels for each page and overall folder structure for future revisions to be processed.
Bookmarking and Page Labeling
Labeling can be done either from the bookmarks or from the thumbnails panel but we will always begin with bookmarks because of the way they list out making it easy to QC them.
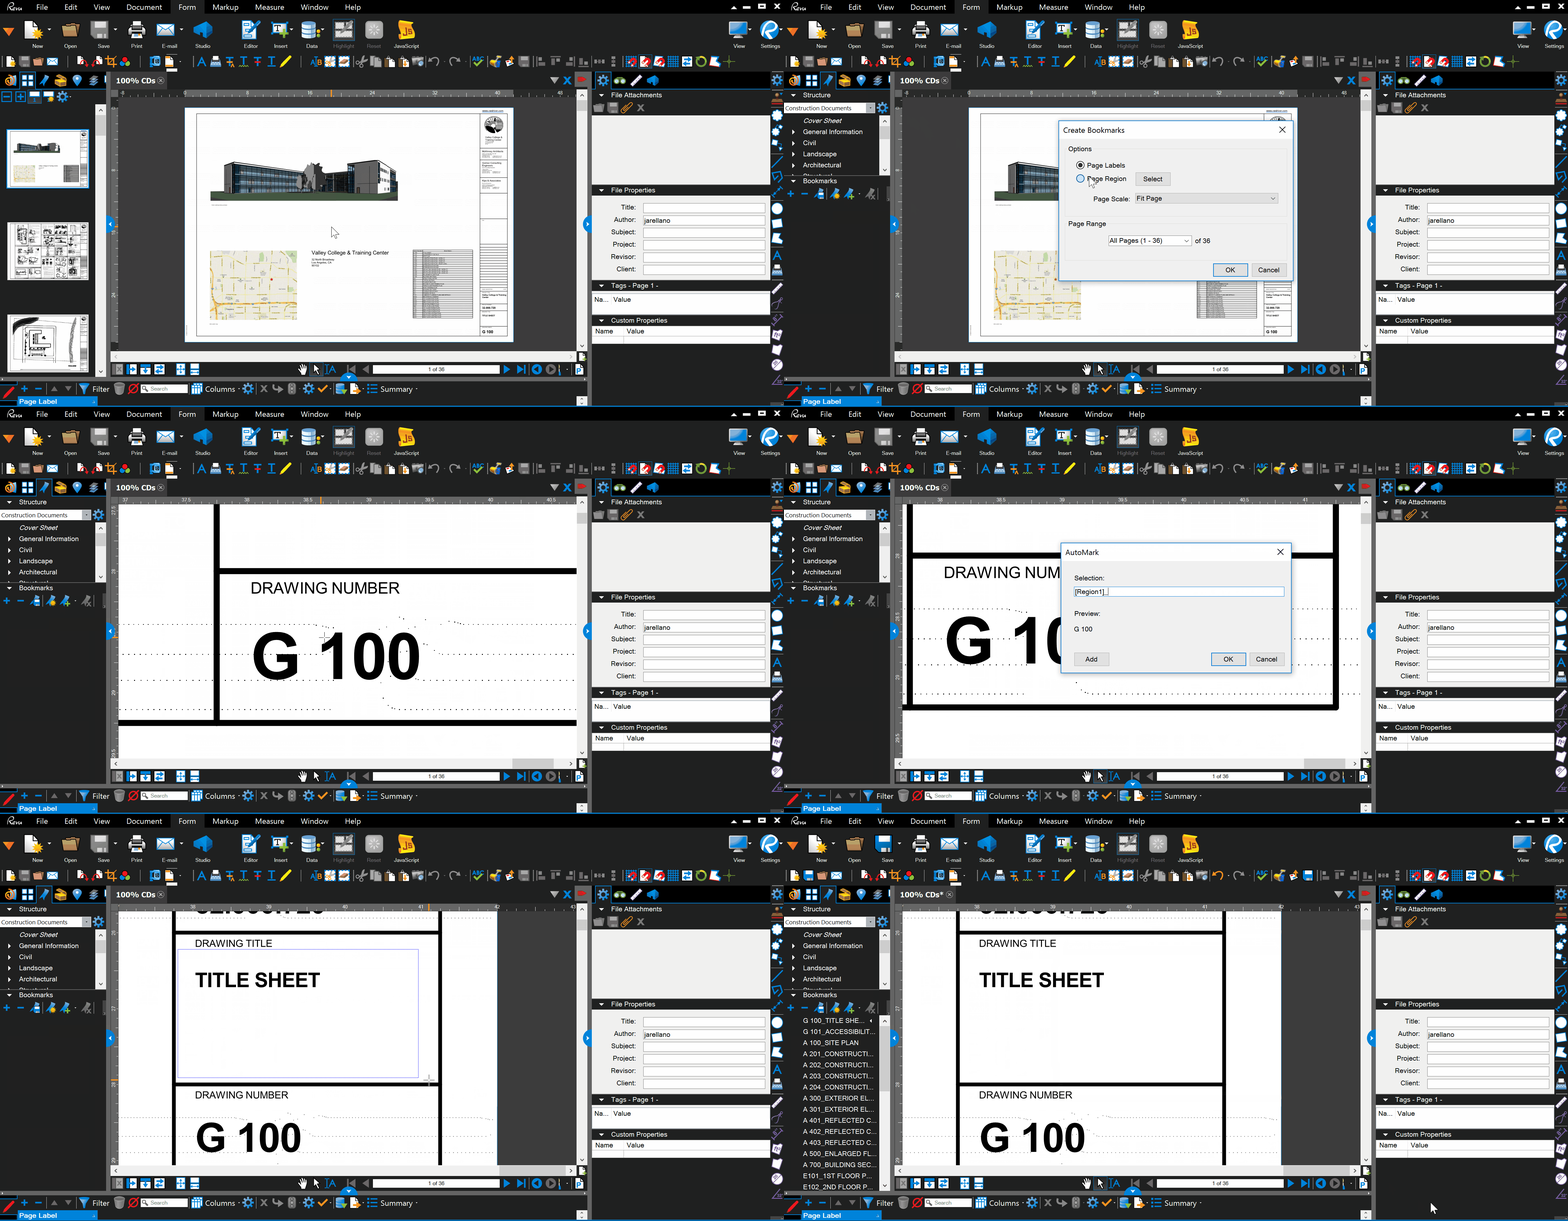
1. Bookmarks from Drawing Title Block
- Go to the
Bookmark Tabin the left panel - Click on Create Bookmarks (Bookmark with the Orange Asterisk)
- Select the Page Region Radio button and click on
Select - Use your mouse to navigate to title block of the sheet you are on
- First select the Page Number. Tip: Select a larger area to account for larger numbers
- Check that the Preview shows the number correctly and then after
[Region 1]type an underscore_- The underscore is important as it will serve as a deliminator and is required for the RXDS Indexer
- Click on
Addthen select the Sheet Title as was done with the Page Number - Press
Okand pressOkagain

2. QC Bookmarks
In the case of the exercise drawings, the bookmarks will come out perfect but most drawings don’t always come out perfect. It is for this reason that we run the bookmarks first in order to get an easy list to QC
Be sure to check for the following items:
- Misspelled Sheet Titles
- Sheet Titles are not imperitive to be perfect but Drawing Numbers should be perfect
- Check for 1’s that might have been set as L’s or 0’s that might have been set as O’s
- Change any
/to-
Double click on any bookmark to edit it’s text as shown below.

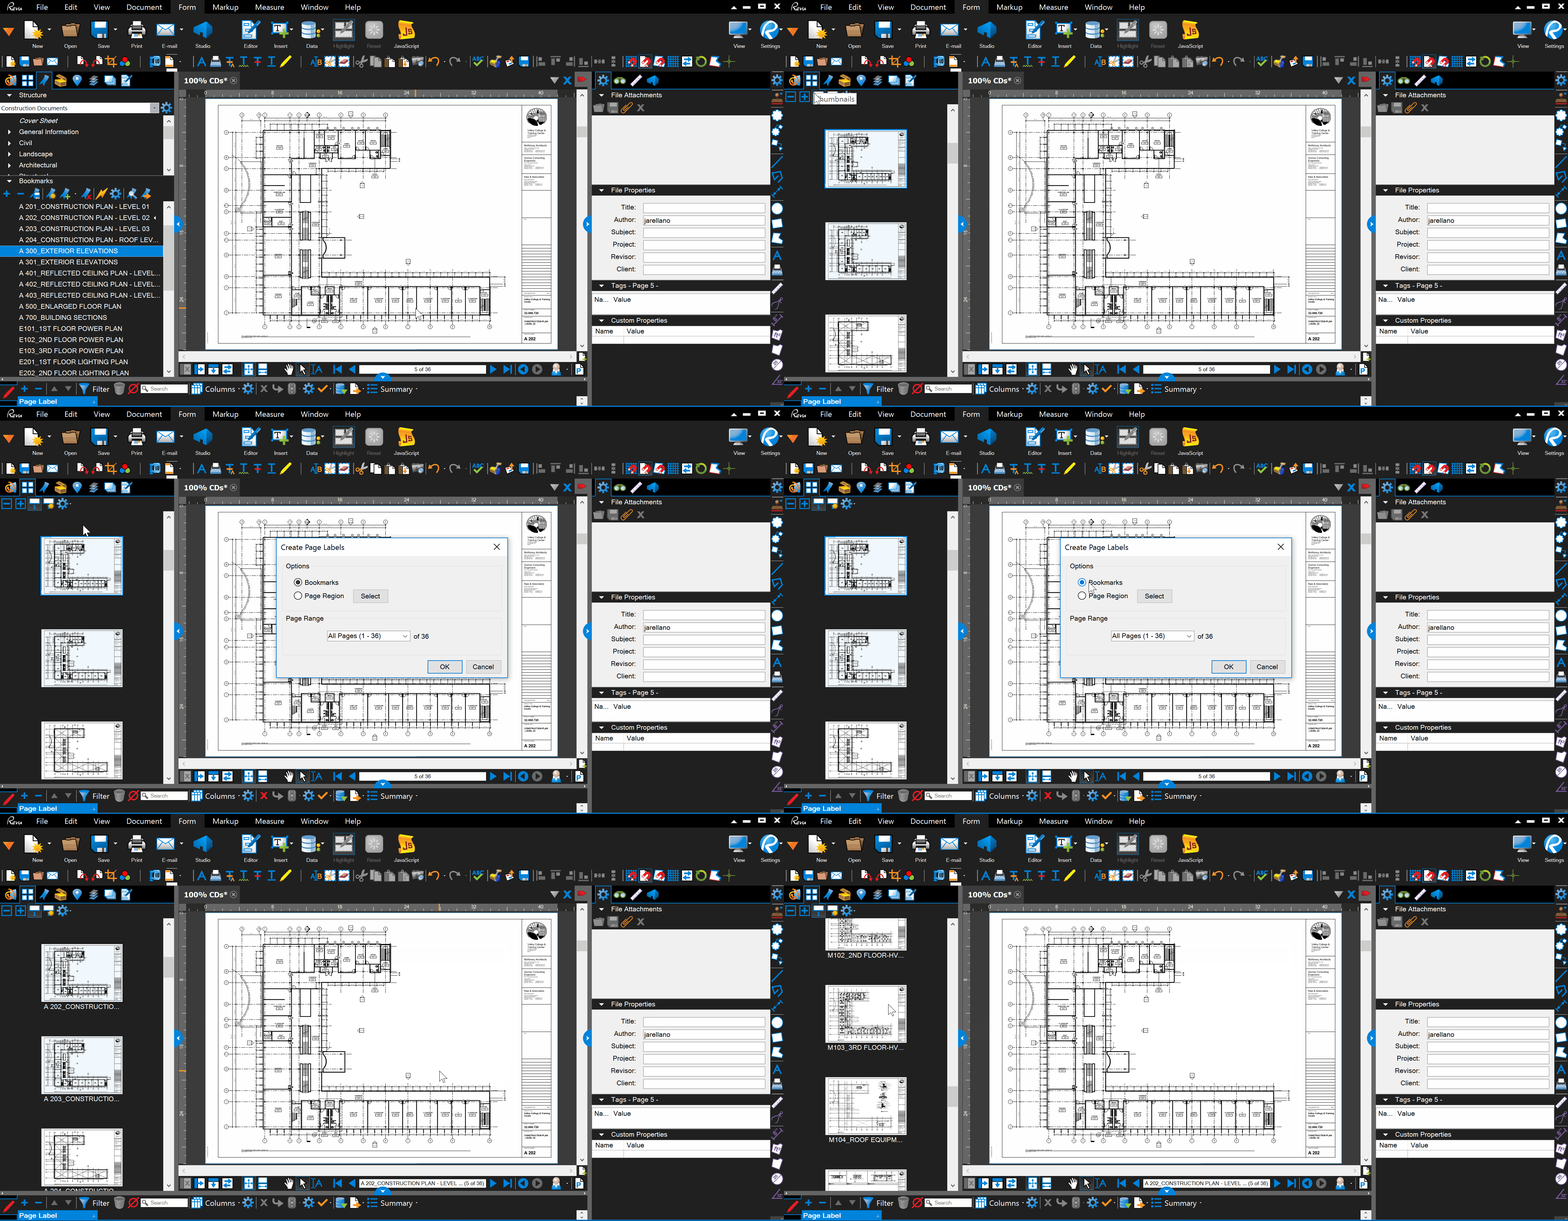
3. Create Page Labels from Bookmarks
Now that we have checked all of our bookmarks for errors, we can transfer those bookmarks to our pages labels.
- Click on the Thumbnails Tab in the left panel
- Then click on the
Create Page LabelsIcon - This time instead of creating from a Region we will create Page Labels from the Bookmarks that we have already created and QC’d
- Press
Ok - Double check that all the Labels transfered over
Note: If you find errors, you can always go back to the bookmarks and fix them. Then repeat these steps for Creating Page Labels.

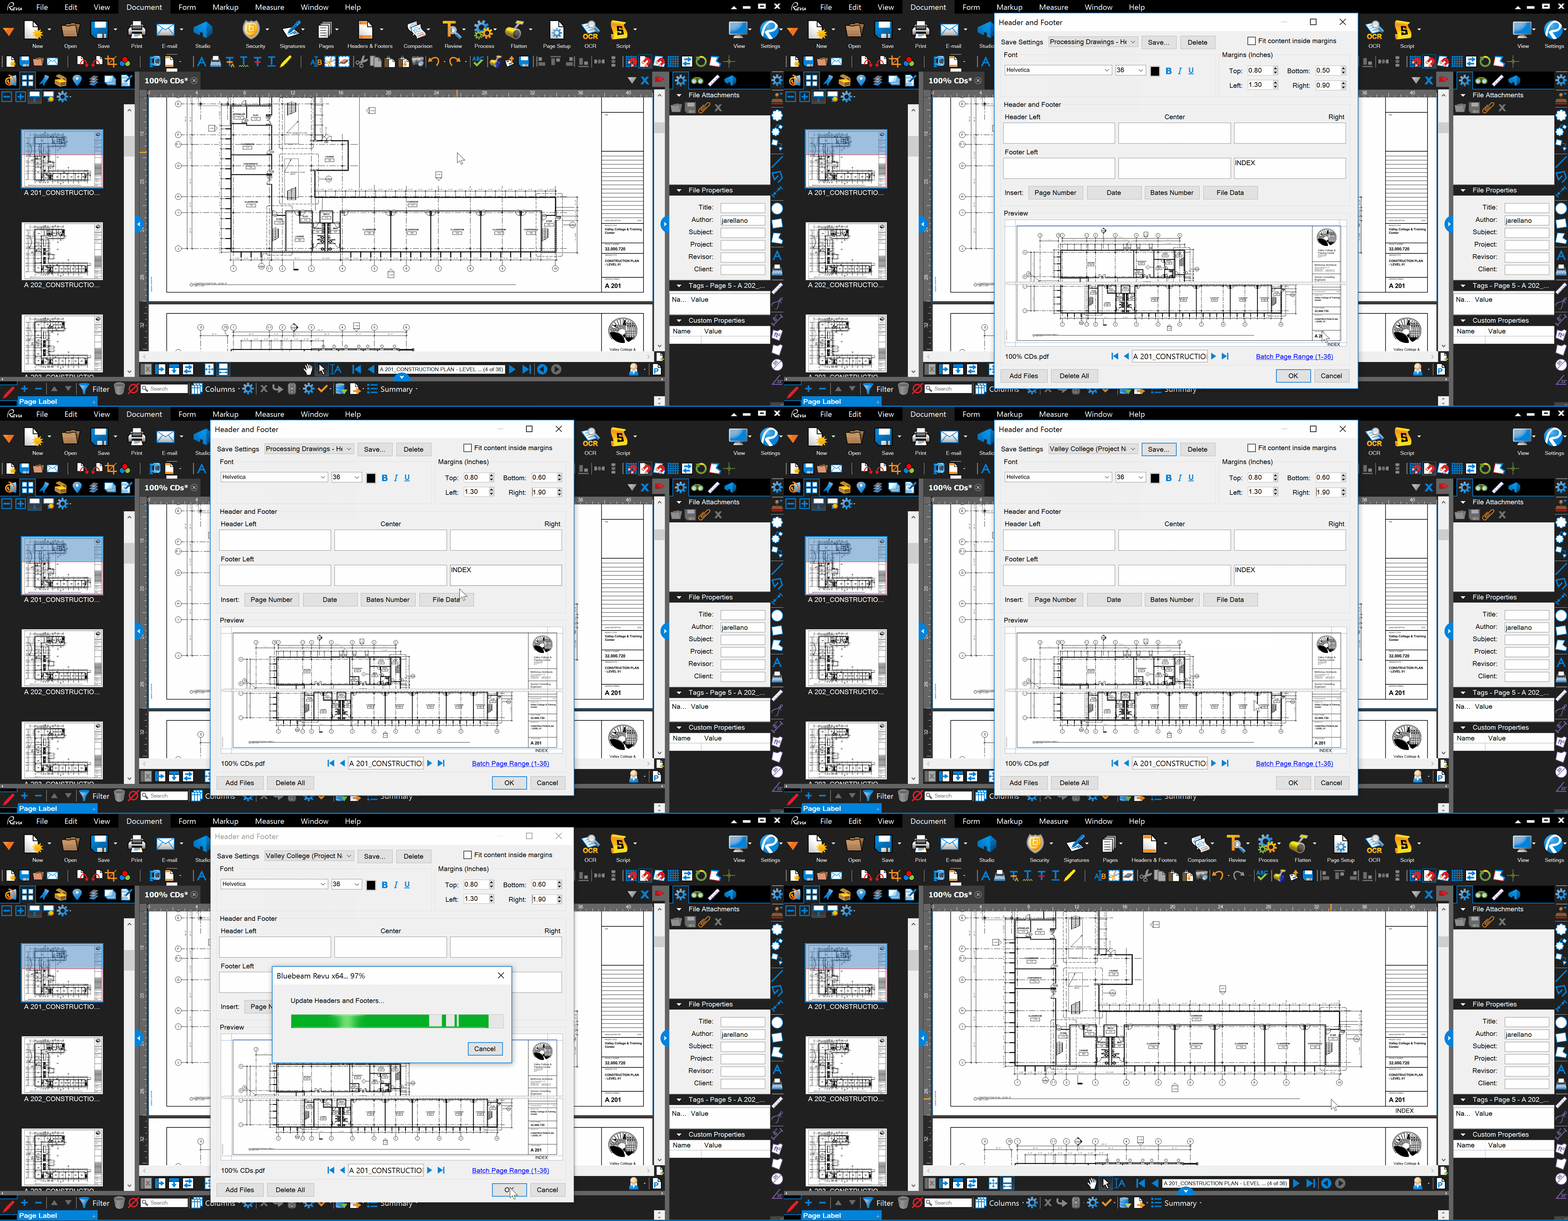
4. Add an “Index” footer to all pages
This “Index” text will serve as a place to link our pages back to the index. Linking will be demonstrated in the upcoming tutorials. For now this text will be static.
- In the Ribbon go to
Document --> Headers & Footer --> Add - If you are using the RXDS Custom Profiles, you will have a
Saved SettingcalledProcessing Drawings. Select it. - You will see in the preview that the “Index” is added to the right side footer under the drawing number
- Adjust it by increasing or decreasing the Right and Bottom Margins as shown below.
- Lastly, don’t forget to save your settings as a new preset and name it the name of your project. This way you can reuse these settings when you need to process revisions for the same project
- Press
Okand allow Bluebeam to process - Because you saved a Header Footer Preset, you must save your profile. See last step in the GIF below.

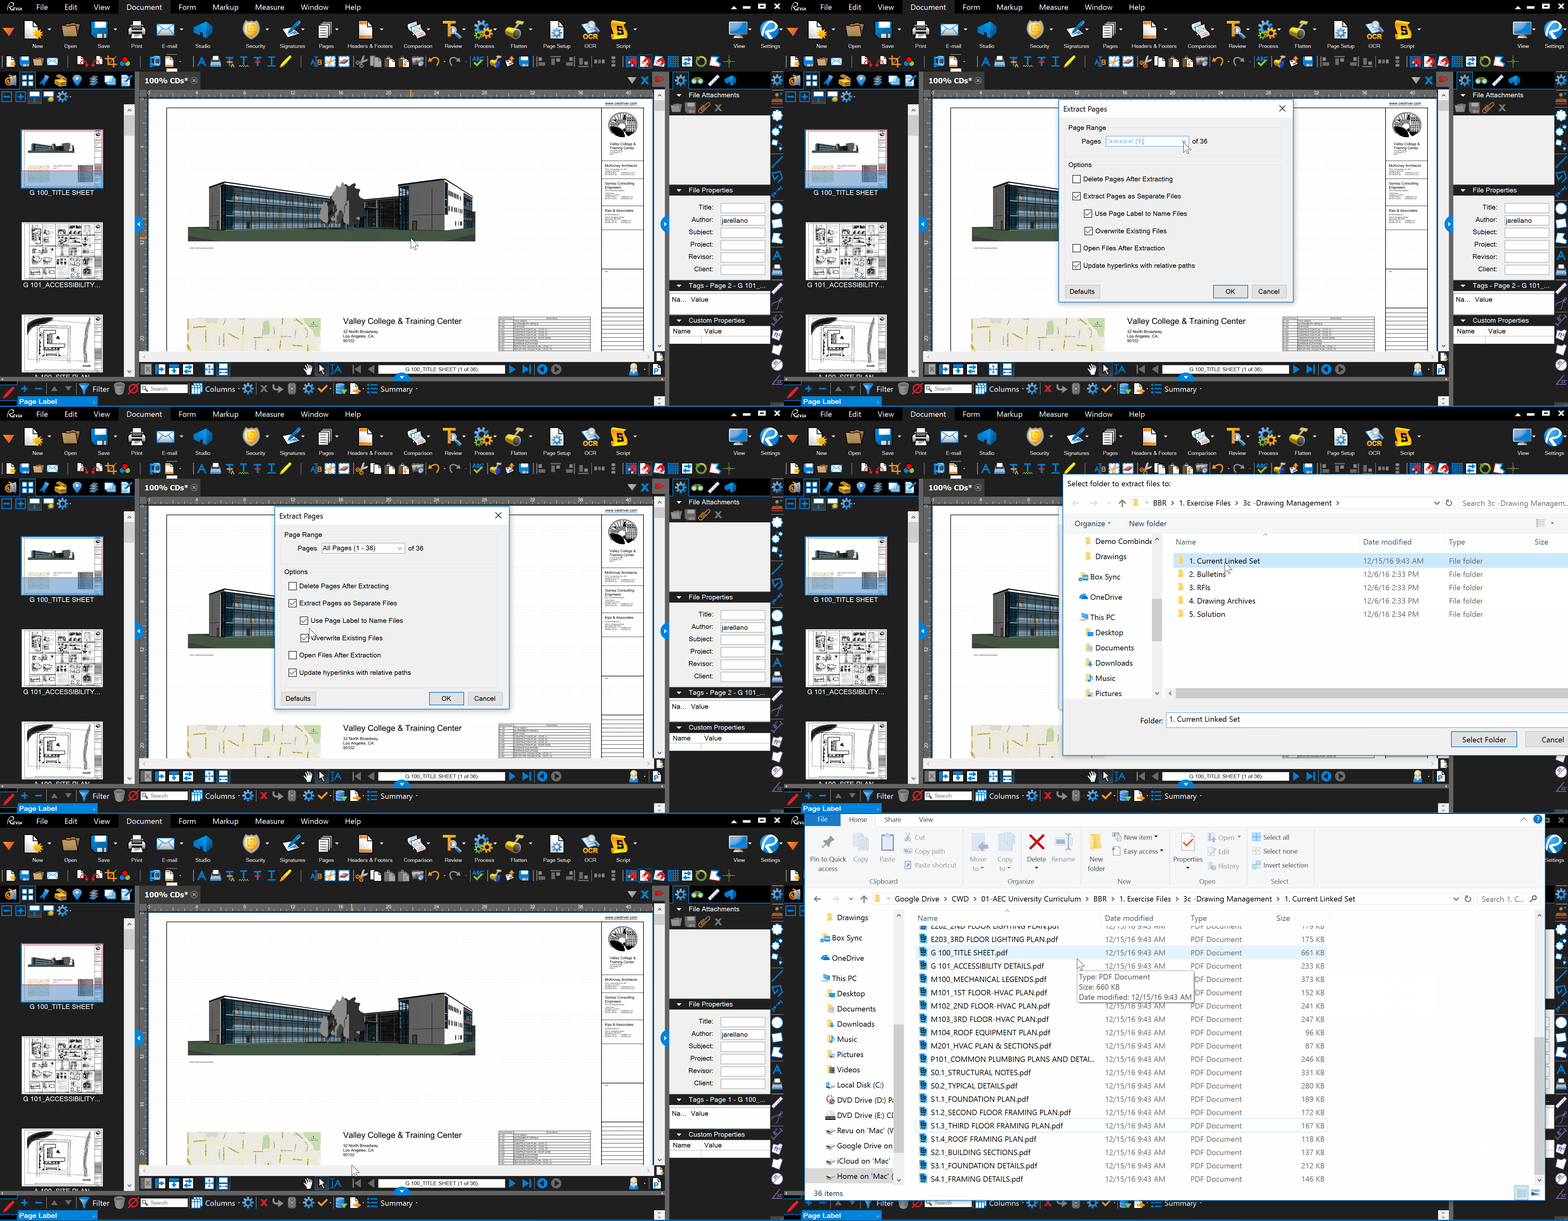
5. Extract to Separate Files
This is the final part to Part 1 of Drawing Processing. Here you will Extract all the Pages to the Folder where the drawings will stored.
This folder should be empty and should only ever contain a clean set of drawings and no other files. For now all sheets will be dumped into this folder. In the next Part of Drawing Processing, we will organize the drawings into separate folders.
- Go the Thumbnails Tab in the Left Panel
- Right click on any thumbnail and select
Extract Pages - In the drop down be sure to select
All Pages - Use the following settings:

